How to format and upload spreadsheets and .csv files
How to format and upload spreadsheets and .csv files

Step 1. Formatting your Spreadsheet
The details you will need to include in your spreadsheet (and in this order) are as follows:
Name: You should format as ‘First name Last name’, alternatively if you use Customer ID’s to identify you clients, those ID numbers can be included here.
Address: Include the house number (if applicable), Street Name, City, County/State.
Eircode: This could be your post code or zip code depending on what region you are in.
Phone Number (Optional): The driver will have access to this number in the event contact can not be made at delivery. Also if notifications are set up this is the number the SMS will go to. Keep in mind that phone numbers need to be entered in the format of country code, area code and phone number ie. +353 01 23 3456.
Email (Optional): If notifications are set up this is the address that will receive emails for delivery updates.
Delivery Notes (Optional): If you want to give your customers the option to add notes to make delivery easier, for example, Leave the package with a neighbour if no answer or The code to the gate is XYZ.
Additional fields not mentioned here?: No problem! You can add custom fields for any extra information you require.
Step 2: Download your Spreadsheet
Navigate to: File > Download as > Microsoft Excel (.xlsx) or .csv.
Step 3: Upload your Spreadsheet to SmartRoutes
Once you have your file formatted and downloaded, now you can upload directly to SmartRoutes.
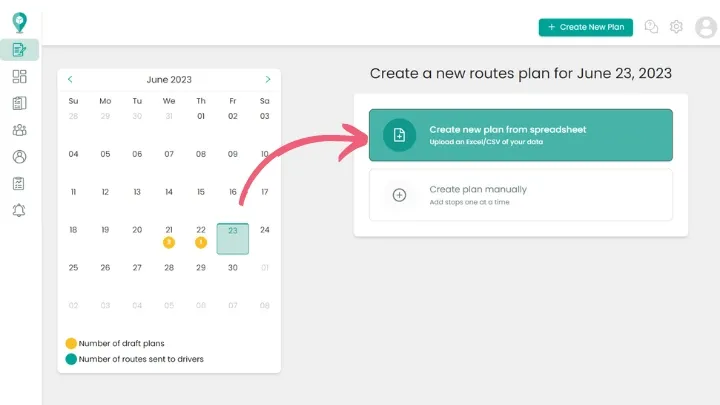
Click ‘Create new plan from Spreadsheet’ on the desktop app.
You can either click ‘Choose File’ and from their select the file you wish to upload from your folders or from an open folder you can drag and drop the file.
Step 4: Preview Data
You will be asked ‘Does the highlighted row in the table below match your column headers?’
If they do - great! Click ‘Yes’.
On the following screen click ‘Finish Matching’
Then finally click ‘Finish Upload’
However, if there are any issues with your data you will need to click ‘select another row’ and click on the row that you need to fix.
Then click ‘Continue’.
From here you can manually select your header rows from the drop down.
If you can’t find the right field you can set up custom fields in your settings.
Happy Routing!
Didn’t answer your question?
You can see our other guides here or contact support at support@smartroutes.io.
Please provide us with some additional feedback
Thanks for your feedback. It is greatly appreciated